
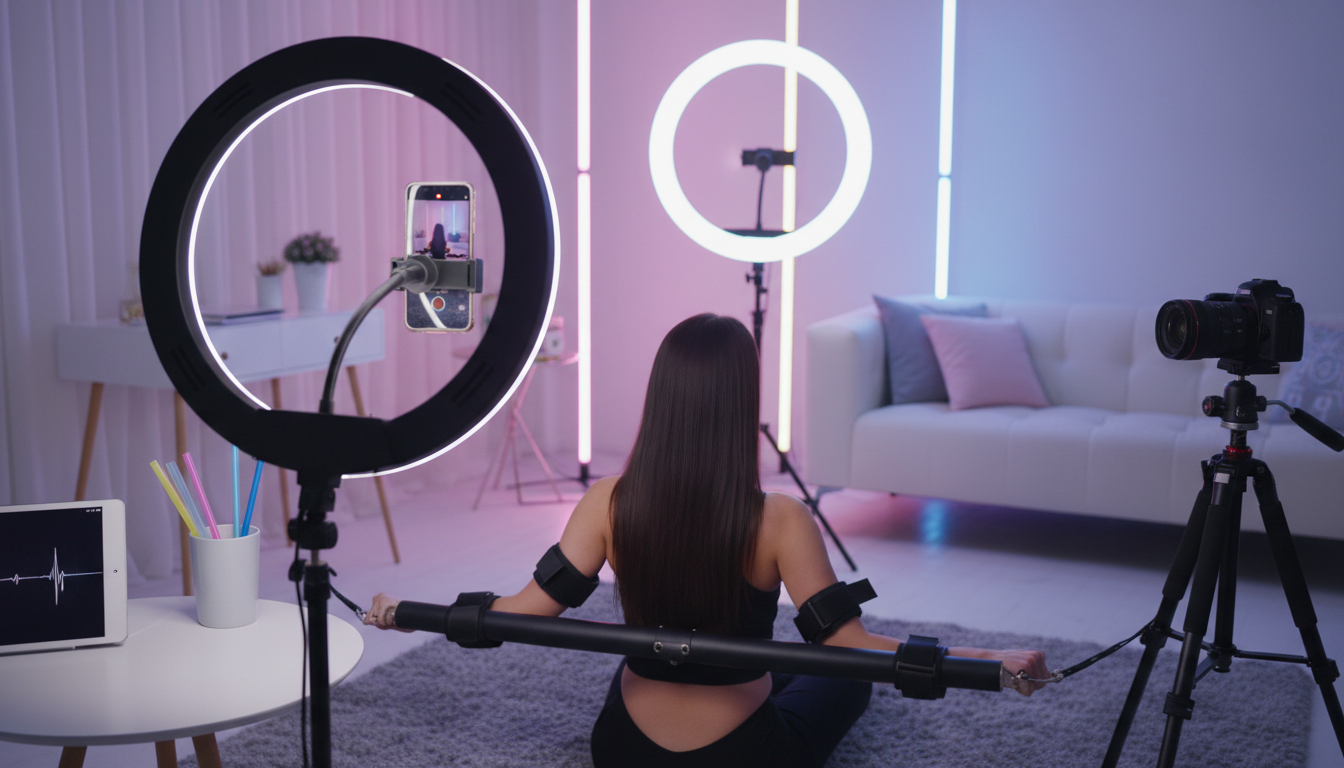
Using Spreader Bars: Positions and Safety Tips
Using Spreader Bars: Positions and Safety Tips
Spreader bars are versatile restraint devices used in bondage modeling and BDSM practices to maintain limbs in an open, spread position. This comprehensive guide explores how to use spreader bars safely and effectively, covering various positions, equipment selection, and essential safety protocols. Whether you're a professional bondage model, photographer, or practitioner exploring restraint techniques, understanding proper spreader bar usage ensures both artistic results and participant wellbeing. This guide emphasizes consent, communication, and risk-aware practices throughout all applications.
Prerequisites and Essential Knowledge
Before incorporating spreader bars into any bondage session, ensure you have:
- Explicit consent from all participants with clear discussion of boundaries
- Basic bondage knowledge including understanding of circulation, nerve safety, and emergency release
- Quality equipment that is properly maintained and rated for body weight
- Safe environment with adequate space and comfortable flooring options
- Communication system established (verbal check-ins or non-verbal signals)
- Safety scissors or emergency release tools immediately accessible
Understanding Spreader Bar Equipment
A bondage spreader bar consists of a rigid bar with attachment points at each end, designed to keep limbs separated at a fixed distance. Modern spreader bars come in various materials and configurations to suit different applications and experience levels.
Types of Spreader Bars Comparison
| Type | Material | Adjustability | Best For | Weight Capacity |
|---|---|---|---|---|
| Fixed Bar | Metal/Wood | None | Experienced users, photography | 200-300 lbs |
| Adjustable Bar | Metal with telescoping | Variable length | Beginners, multiple body types | 150-250 lbs |
| Travel Bar | Aluminum/Carbon fiber | Collapsible | Mobile sessions, storage | 150-200 lbs |
| Heavy-Duty Bar | Steel with reinforcement | Fixed or adjustable | Suspension, advanced positions | 300+ lbs |
| Padded Bar | Metal with foam/leather | Usually fixed | Comfort-focused, longer sessions | 200-250 lbs |
How to Use Spreader Bars: Step-by-Step Application
Proper application of spreader bars requires attention to detail and prioritization of safety over aesthetics. Follow these steps for secure and comfortable restraint:
- Conduct pre-session negotiation discussing specific positions, duration limits, and safe words or signals
- Inspect all equipment checking for cracks, worn straps, loose connections, or compromised attachment points
- Prepare the environment ensuring soft flooring, adequate temperature, and removing hazards from the area
- Position the restrained person comfortably starting in a relaxed position before applying the bar
- Attach cuffs or restraints to ankles or wrists first, ensuring proper fit without excessive tightness
- Connect to spreader bar securing each attachment point and verifying all connections are locked
- Perform circulation checks looking for color changes, temperature differences, or numbness
- Make incremental adjustments if transitioning to more challenging positions, allowing adaptation time
- Monitor continuously maintaining visual contact and regular verbal check-ins throughout the session
- Execute controlled release removing restraints in reverse order with support for potentially stiff limbs
Common Spreader Bar Positions
Ankle Spreader Positions
Ankle spreaders create vulnerability and visual appeal while restricting movement. When learning how to use spreader bars for ankle restraint:
Standing Positions: The restrained person stands with legs spread, requiring balance and core strength. This position works well for photography but should be limited in duration (10-15 minutes maximum) due to muscle fatigue.
Lying Positions: The person lies on their back with legs elevated or flat, ankles spread. This comfortable position allows longer duration and reduces strain on joints.
Kneeling Positions: With ankles spread while kneeling, this position creates aesthetic appeal but requires knee padding and frequent position changes to prevent joint stress.
Wrist Spreader Positions
Wrist spreaders prevent the hands from coming together, creating helplessness while allowing more mobility than fixed restraints.
Overhead Positions: Arms extended above the head with wrists spread, often combined with ankle restraints. This position requires secure suspension points and constant monitoring for shoulder stress.
Behind-Back Positions: Wrists spread behind the back, which should only be attempted by experienced practitioners due to shoulder vulnerability.
Combined Positions
Advanced bondage spreader bar setups may use multiple bars simultaneously:
- Ankle and wrist bars in "X" configuration
- Ankle bar with separate arm restraints
- Thigh spreaders combined with ankle spreaders for maximum immobilization
Safety Guidelines and Risk Management
Essential Safety Practices
- Never leave a restrained person unattended for any reason
- Avoid pressure on joints by ensuring bars are appropriately sized for the person's body
- Check circulation every 5-10 minutes looking for discoloration, coldness, or tingling
- Limit session duration with beginners starting at 15-20 minutes maximum
- Maintain body temperature as restricted movement reduces circulation and heat generation
- Have emergency procedures practiced and understood by all participants
Risk Factors to Monitor
Bondage spreader bar use carries specific risks that require awareness:
- Nerve compression particularly in wrists, ankles, and behind knees
- Joint hyperextension when bars are too wide for body proportions
- Muscle cramping from maintained positions without movement
- Circulation restriction from tight cuffs or prolonged positioning
- Falls or balance loss in standing positions
- Psychological distress from vulnerability or unexpected reactions
Troubleshooting Common Challenges
Challenge: Cuffs sliding or rotating on the bar during movement
- Solution: Use locking carabiners or D-rings with secure attachment points; consider bars with built-in rotation prevention
Challenge: Discomfort or pain developing quickly in position
- Solution: Reassess bar width adjustment; add padding to cuffs; reduce tension or change position angle immediately
Challenge: Difficulty maintaining balance in standing positions
- Solution: Provide support handles, reduce bar width, or transition to seated/lying positions
Challenge: Equipment failure or unexpected release
- Solution: Always use redundant safety measures; inspect equipment before each session; replace worn components proactively
Challenge: Participant experiencing panic or anxiety
- Solution: Immediate release protocol; maintain calm communication; provide comfort and reassurance; discuss triggers before future sessions
Selecting the Right Spreader Bar
When choosing equipment, consider these critical factors:
- Length adjustability for accommodating different body types and positions
- Weight rating exceeding the heaviest expected load by at least 50%
- Attachment quality with metal D-rings, carabiners, or swivel points
- Padding options for extended sessions or sensitive skin
- Storage and portability if traveling to different locations
- Aesthetic preferences matching the visual style of your bondage photography or practice
Frequently Asked Questions
Q: How long can someone safely remain in spreader bar restraints?
A: Duration depends on position, experience level, and individual physiology. Beginners should limit sessions to 15-20 minutes, while experienced participants may tolerate 30-45 minutes with proper monitoring. Always prioritize comfort and circulation over arbitrary time goals. Lying positions generally allow longer duration than standing or suspended positions.
Q: What's the ideal width for an ankle spreader bar?
A: For most adults, ankle spreader bars between 24-36 inches provide balance between restriction and safety. Shorter bars (18-24 inches) work for milder restraint or smaller frames, while longer bars (36-48 inches) create more challenging positions. The bar should spread legs beyond comfortable standing width without forcing joints into extreme positions.
Q: Can spreader bars be used for suspension bondage?
A: Only heavy-duty spreader bars specifically rated for suspension should be used for partial or full body suspension. Standard spreader bars are designed for supported positions only. Suspension requires specialized equipment, advanced knowledge, and understanding of suspension-specific risks. Never attempt suspension without proper training and equipment.
Q: How do I know if circulation is being compromised?
A: Warning signs include numbness, tingling, color changes (pale, blue, or purple), temperature differences (cold extremities), reduced mobility in fingers/toes, or sharp pain. Any of these symptoms requires immediate release and circulation restoration. Perform the "capillary refill test" by pressing a fingernail or toenail—color should return within 2 seconds.
Q: What should I do if someone becomes stuck or equipment fails during a session?
A: Keep emergency safety scissors (EMT shears) immediately accessible throughout every session. These can cut through leather, rope, and webbing instantly. Know how to quickly release all attachment points. Practice emergency releases during non-critical times so the procedure becomes automatic. Never use bondage equipment without having emergency release tools within arm's reach.
Conclusion and Next Steps
Mastering spreader bar positions requires patience, communication, and unwavering commitment to safety protocols. Start with basic positions in comfortable environments, gradually building experience and confidence before attempting advanced configurations. Invest in quality equipment from reputable manufacturers, and never compromise on safety features to save money.
For those interested in expanding their bondage restraint knowledge, consider exploring related equipment such as restraint systems, bondage furniture, or rope techniques that complement spreader bar work. Always prioritize education, practice with communication-focused partners, and join experienced communities where safe practices are emphasized. Remember that the goal is mutual satisfaction, artistic expression, and trust-building—never push boundaries without explicit consent and careful risk assessment.